Time to add the bacteria! I mistakened the word “fridge” as the freezer instead of the refrigerator because it said the bacteria should be stored in an environment of 4°C, and I thought the refrigerator wasn’t cold enough.
이제 박테리아를 키울 시간이에요! 영어로 refridgerator(냉장고)를 줄여서 fridge라고 부르는데 저는 그 용어를 잠시 까먹어서 냉장고의 줄임말을 냉동고로 착각했어요.. 그리고 사용 설명서에 박테리아가 들어있는 용기는 4°C인 환경에서 보관해야 된다고 써있어서 저는 냉장고가 당연히 4도까지 낮은 온도가 아닐줄 알고 냉동고에 보관했어요.
So, when I took out the zip lock bag containing two tubes of non-pathogenic E. coli DH5a bacteria and one tube of sterile water, the fluid containing the E. coli DH5a bacteria and the sterile water were frozen.
그래서 박테리아랑 멸균수가 들어있는 지퍼백을 꺼냈을 때, 박테리아가 들어있는 액체랑 멸균수가 얼려버렸어요..
I held the bottle of sterile water between my hands and rubbed back and forth furiously to increase friction. More friction –> more heat. I did not run this tube of sterile water under running warm water because I did not want an accidental additional drop of unsterile tap water inside the completely sterile water(just in case the tube lid had a small opening)
멸균수를 녹이기 위해 따뜻하게 흐르는 수돗물에 담길까하다가 혹시 멸균수 용기가 아주 살짝 열려있을 수도 있어서 멸균수가 아닌 수돗물도 멸균수랑 섞일까봐 일부러 흐르는 따뜻한 물에 안 담갔어요. 대신에, 두 손바닥에 끼고 열심히 손바닥을 앞뒤로 비볐어요. 마찰이 더 일어날수록 열이 더 가해지기 때문이에요. 역시나, 얼린 물이 짧은 시간에 녹았어요 😀
I was so glad the kit provided two bottles of E. coli DH5a bacteria because I mistakened 100μl as 10μl… For the first bottle, I added in 10μl of Sterile Water, and while I was shaking the E. coli DH5a bacteria tube, something felt strange. I was shaking it, but I barely saw any liquid inside the tube, and I was so confused how this much liquid was supposed to cover 7 LB Agar plates.. I soon realized that I was supposed to add 100μl of sterile water and added 100μl of sterile water to a new E. coli DH5a bacteria tube.
키트가 너무나 다행이도 E. coli DH5a박테리아 용기를 두개 제공했어요. 이게 왜 다행이냐면 저처럼 실수를 하면 다시 도전할 수 있는 박테리아 용기가 하나 더 있기 때문에이요. 원래 E. coli DH5a에 100μl의 멸균수를 넣어야되는데 저는 100μl을 10μl로 잘못 읽어서 첫 용기에는 10μl의 멸균수를 넣었어요. 멸균수에 박테리아가 녹게끔 흔들어야 되는데, 아무리 흔들어봐도 박테리아랑 멸균수가 이상하게 양이 너무 적은거에요.. 용기를 흔들었더니 액체가 사라진 느낌? 양이 너무 적어서 벽에 다 달라붙어서 안 보였던 것 같아요. 딱 그때, 아, 10μl가 아니라 100μl이구나라고 깨달았어요.. 그래서 2번째 박테리아 용기에 100μl의 멸균수를 넣었어요.
In the instruction manual, it stated the first demarcation mark of the pipette tip was supposed to be 10μl, but in the How to pipette manual they provided, they instructed to turn the thumb plunger to change the settings of the amount of liquid taken in/out. I changed the settings of the pipette to only take in 10μl, but, it passed the first demarcation mark on the pipette tip, so I just filled the sterile water up to the first mark on the pipette tip instead of sucking in all the liquid on the desired position(first stop).
그리고 이 실험하면서 계속 의문이였던 피펫 사용방법이 있었어요. 키트에 들어있었던 사용설명서에는 피펫팁에 그려진 첫 선까지 액체를 빨아들이면 10μl라고 했어요. 그리고 그 밑에 무조건 읽어야 되는 피펫 사용방법이 링크로 써있었어요. 실험을 계속하기 전에 무조건 읽어야 된다고해서 링크를 열심히 찾아봤어요. 마이크로피펫의 엄지로 누르는 버튼을 통해서 액체를 빨아들이는 시스템인데, 얼마나 액체를 많이 빨아드고 싶은지 엄지 버튼을 돌리면 설정을 맞출 수 있어요. 그래서 제가 10μl로 써있게 돌렸는데, 연습으로 빨아들었을 때, 사용설명서에서 말한 것처럼 첫선을 지났어요.. 이게 너무 헷갈렸어요.. 그냥 선에 액체를 맞추는걸로 했지만, 아직 정확히 무슨 방법이 올바른 방법인지 모르겠어요.
When I added in 100μl of sterile water to the E. coli DH5a bacteria tube, I wasn’t really sure if the bacteria was dissolved in the water because the bacteria itself was also frozen and the color of the bacteria was similar to the color of the water.
E. coli DH5a박테리아 용기에 100μl의 멸균수를 넣고 흔들었을 때, 박테리아가 녹았는지 안 녹았는지도 헷갈렸어요. 원래 들어있었던 박테리아가 거의 무(無)색에 가까웠고 박테리아 액체도 얼어있었던 상태여서 멸균수에 녹았는지 안 녹았는지 잘 모르겠더라고요..
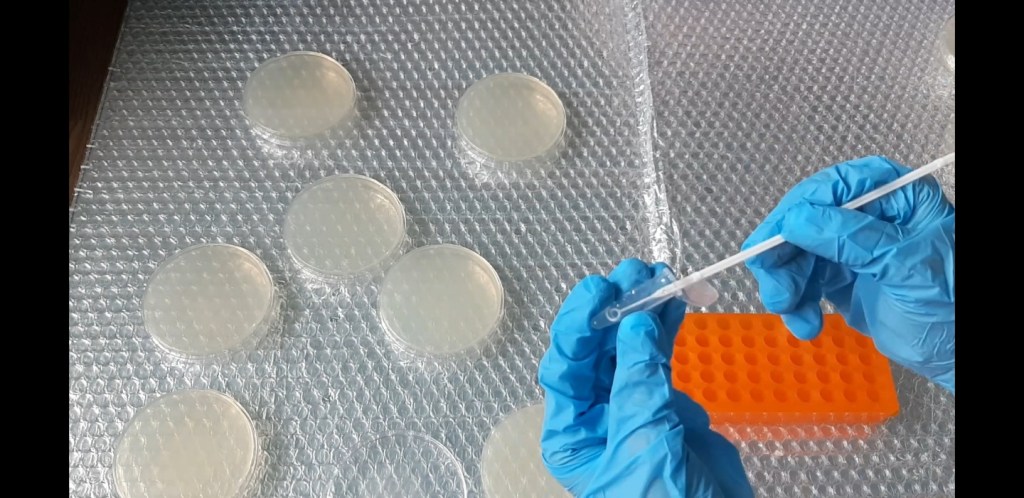
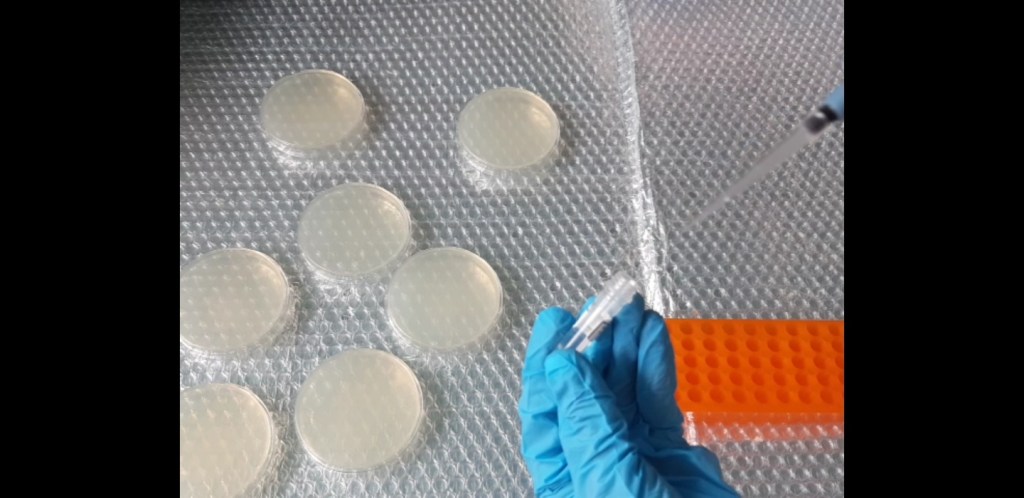
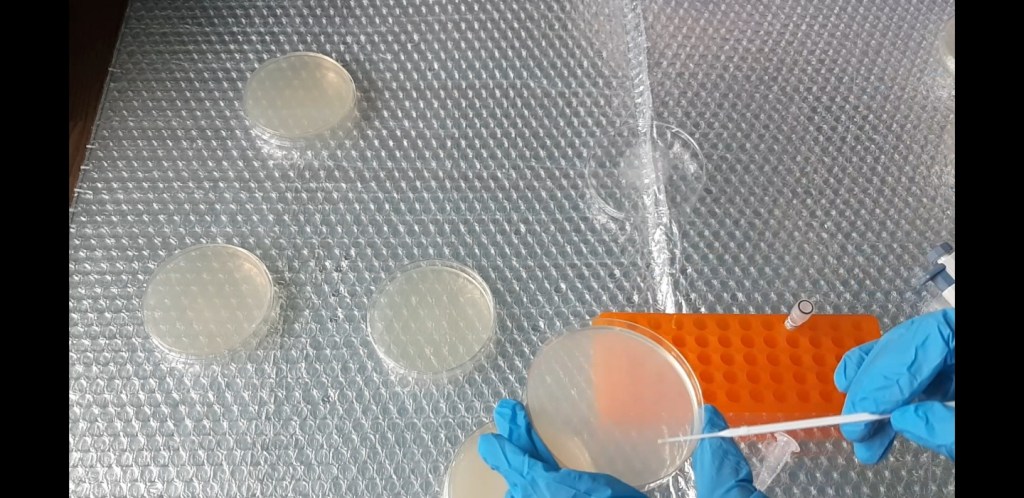
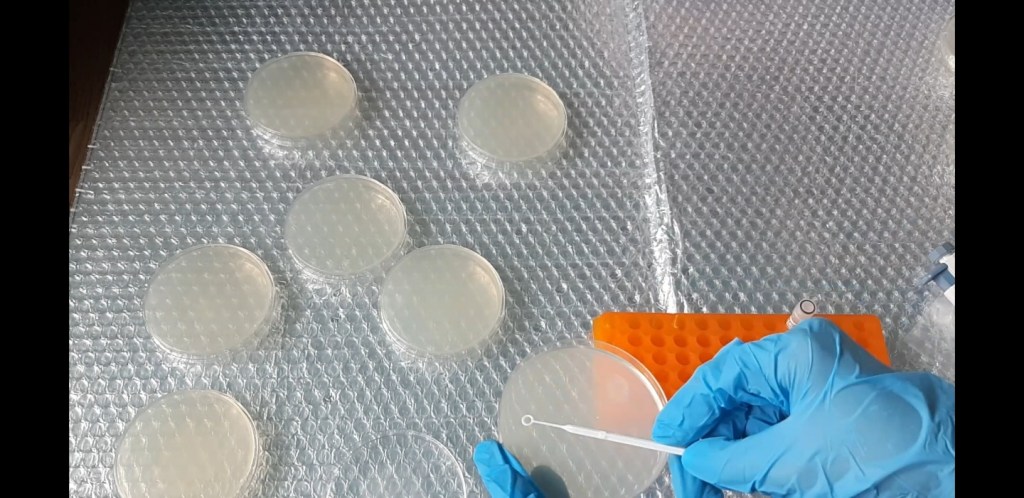
I researched about the correct utilization method of Inoculation Loops and the articles stated that I should never redip the Inoculation Loop back into the bacterial solution after I spread it out on an agar plate to prevent contamination.. Because of this, I used both sides of the Inoculation Loop stick, so a few of the LB agar plates barely had bacteria showing the next day.
액체를 모으거나 액체를 바를때 사용하는 도구의 이름이 ‘멸균루프’에요. 멸균루프의 올바른 사용방법을 인터넷에 찾아봤는데 이런 일회용 루프는 박테리아 액체에 담그고 아가 접시에 바른 후 다시 박테리아 절대 담그면 안된다고 써있었어요. 안된다고 써있길래 걱정을 많이해서 진짜 일회용으로 썼어요.. 원래 더 큰 루프로 박테리아를 담아야 되는데 큰 루프만 쓰고 버리기에는 아까워서 작은 루프로도 발랐어요. 그래서 다음날 어떤 페트리 접시는 박테리아가 많이 안 자랐어요.
I used up too many Inoculation Loop sticks during this process that this led to a lack of Inoculation Loop sticks later on when I was spreading the newly transformed bacteria onto the LB Strep/Kan/Arabinose Agar plates.
박테리아를 바른다고 멸균 루프를 너무 많이 사용했어요. 그래서 LB Strep/Kan/Arabinose Agar에 새로 만든 박테리아를 바를때 루프가 부족했어요.
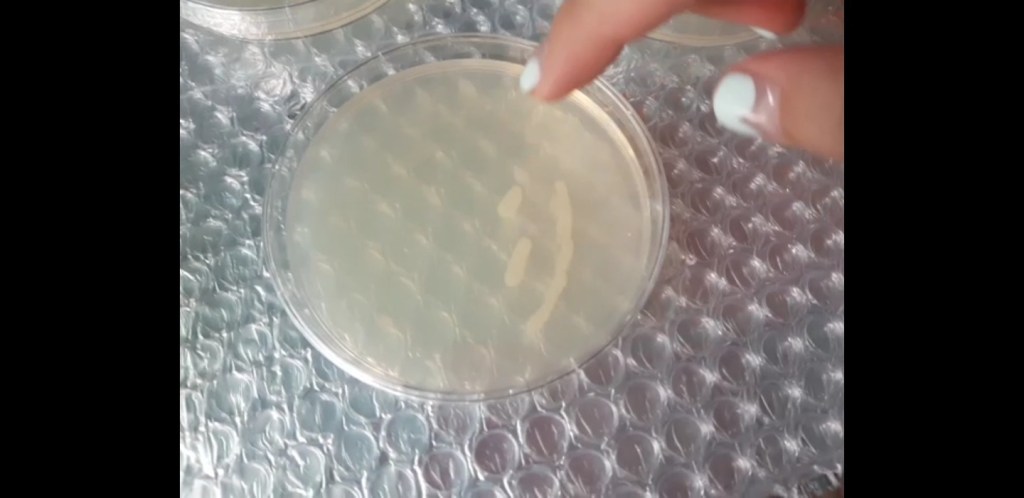
The results afterwards was kind of successful, because 3 of the LB Agar plates had tiny specks of bacteria, 4 LB Agar plates had small circles of bacteria, and only one of them had a few bigger spots of bacteria growth. But overall, all the plates did show bacterial growth.
결과가 성공적이였어요. 대부분의 접시에 박테리아가 많이 안 자라긴 했지만, 박테리아를 실험할 수 있을 양이여서 성공이라고 볼 수 있을 것 같아요!!
-Joanna Kim, June 25, 2020, 11:04PM KST
